
Setup
Set up OcuClaw, your way.
Hand the setup to your agent, or work through it yourself.
Step 1 · Your glasses
Do you have Even G2?
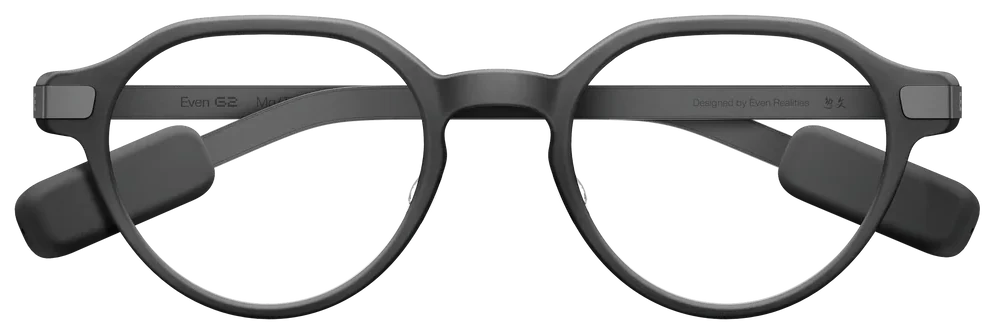
OcuClaw runs on Even G2. Tell us where you’re starting.
You’ll need Even G2 to finish setup.
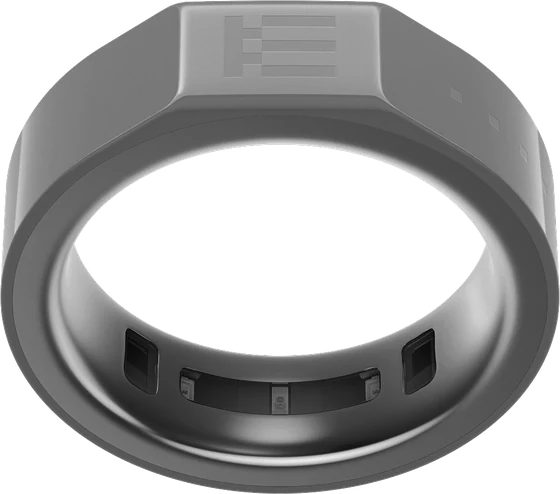
Get the glasses from Even Realities, then return here. The R1 ring on your finger drives the display.
Step 2 · Your setup
Choose your agent.
One choice at a time. You can change anything before continuing.
Choices ready
Your setup path is ready.
Check the choices above, or continue to the setup route built for them.
Even G2 is required to complete the final glasses check.
Next: choose your agent.
Install the OcuClaw plugin from ClawHub, then set up OcuClaw for me.
CLICK TO COPYPaste your agent's feedback block.
Guide experience only. Remove tokens, relay addresses, node names, and anything private.
Feedback will be used to help improve the OcuClaw setup assistant. Your submission will be stored for up to one week.
Get OpenClaw running first.
Complete these two checks. The handoff prompt appears here as soon as your agent is ready.
Cloud host: selected provider · run every command on that server.
OpenClaw is the agent host — everything OcuClaw sets up lives inside it on this machineon your cloud server. Until it's installed there's no agent to hand this setup to.
Run in PowerShell.
Run in Terminal.
Run in a terminal — on WSL2, inside the WSL shell.Run over SSH on the selected server.
A new terminal answers openclaw --version with a version number.
command not found right after installing → the installer updated PATH but this shell hasn't reloaded it — open a new PowerShell windownew terminal and retry. Still missing → re-run the install command and read its output for errors.
A model provider is the brain your agent runs on — OpenClaw can't do anything without one. You sign in on this machinefrom your cloud server session; keys and sessions stay yours.
Finish the installer's onboarding to the end, then add a model provider — e.g. sign in with your ChatGPT subscription. Claude Free, Pro and Max plans aren’t an option: Anthropic’s terms don’t permit them in other apps, though a Claude API key is fine.
Onboarding finishes cleanly and the provider you added is listed as registered.
A provider that won't sign in, or one whose session expired later → openclaw models auth login re-runs the provider sign-in.
Choose where Hermes Agent runs.
Pick this computer or Cloudways in Step 2 to see the Hermes setup path.
Need a hand? Join the Discord.
Hermes Agent on this computer.
Add OcuClaw in Hermes Desktop, then Hermes guides you through pairing. Keep your phone and G2 glasses nearby.
Hermes Agent on Cloudways.
OcuClaw has partnered with Cloudways to offer the best cloud OcuClaw experience. Need help? Visit the official Cloudways channel in the OcuClaw Discord to speak with Cloudways staff.
OpenClaw on Cloudways.
OcuClaw has partnered with Cloudways to offer the best cloud OcuClaw experience. Need help? Visit the official Cloudways channel in the OcuClaw Discord to speak with Cloudways staff.
Get OpenClaw ready first. Your setup routes appear when the agent is ready.
Anything in ‹angle brackets› is yours — replace it before running.
Establish your lane
Confirm the ground before installing anything — glasses paired, host current. Keep your phone nearby.
Everything below installs into OpenClaw on this machineon your cloud server — confirm the glasses and host are ready first.
Prints the minimum version or newer; G2 connected in the Even Realities app; OcuClaw installed from the Even Hub store on the phone.
command not found → OpenClaw isn't installed — set it up at openclaw.ai first. Older version → update OpenClaw before continuing.
Plugin & gateway
Add the plugin, set the relay secret yourself, grant the display hook, and load it.
Pulls the OcuClaw plugin from ClawHub, the scanned stable channel. Some OpenClaw versions also print a community-channel advisory — standard, not an error.
On OpenClaw 2026.9 and later the install asks Proceed with installation? [y/N]. Answer y. If your agent runs it, the agent asks you in chat first.
openclaw plugins inspect ocuclaw --json → the top-level install object is non-null. Appearing in plugins list alone doesn't count.
Older host rejects the clawhub: prefix → openclaw plugins install npm:ocuclaw. Leftovers from a failed attempt (install: null) → re-run the install once with --force, inspect again.
OpenClaw loads the plugin; its tools are available to the agent by default — the one explicit grant is the display-reset hook.
The last line is a read-only sanity check — Config path not found or a profile such as { "profile": "full" } is normal (default exposure applies).
openclaw plugins list shows ocuclaw enabled.
tools.deny naming ocuclaw or group:plugins → that block is deliberate; resolve it before continuing. A non-empty tools.allow lacking both → add "ocuclaw" to that list — don't add an alsoAllow beside it, config rejects both in one scope.
The relay binds a loopback-only port on this machineon your cloud server. Fresh installs pick 47800 and record it automatically at first start — nothing to decide.
Restart once so OcuClaw’s display hook takes effect:
Then check it:
Status: loaded · logs show relay service started on ws://127.0.0.1:‹port› · openclaw config get plugins.entries.ocuclaw.config.wsPort returns the settled port (47800 fresh). Note it — step 06 needs it.
Bind error (EADDRINUSE, "address already in use") → find a free port walking 47800 → 43117 → 38271 — ss -ltnH "sport = :47800"lsof -nP -iTCP:47800 -sTCP:LISTENnetstat -ano | findstr :47800 and netsh int ipv4 show excludedportrange protocol=tcp (empty = free) — then openclaw config set plugins.entries.ocuclaw.config.wsPort ‹port› --strict-json. An earlier attempt left the bind at 0.0.0.0 → openclaw config set plugins.entries.ocuclaw.config.wsBind "127.0.0.1".
Join the halves over Tailscale
Bring Tailscale up, serve the relay privately — two doors, one purpose each — and get your phone onto the same tailnet.
Tailscale makes a private network between this machineyour cloud server and your phone — only your devices can reach the relay.
The sign-in URL prints in the terminal.
Standalone package from tailscale.com/download → sign in in the app.
Installer from tailscale.com/download/windows → sign in from the tray.
tailscale ip -4 prints a 100.x.y.z address.
Using the App Store build instead of the standalone package → its CLI isn't on PATH; wherever step 06 says tailscale, use /Applications/Tailscale.app/Contents/MacOS/Tailscale.
Two tailnet-only routes into the relay: the phone app uses :8444; :8443 is the optional Even AI door. Nothing becomes public — never use funnel.
‹port› = the wsPort from step 04 (47800 on fresh installs).
Run both from an Administrator PowerShell.
tailscale serve status shows both routes proxying to localhost:‹port›. Note the machine name ‹node›.‹tailnet›.ts.net from that output — pairing in step 08 checks this route, and the no-camera fallback types it.
One route missing or pointing at the wrong backend → re-run just that route's command once more. Mac App Store Tailscale → use the full CLI path from step 05's note.
The phone must be on the same private network to reach the relay.
tailscale status on this machineon the cloud server lists the phone, and the phone's Tailscale app shows Connected.
Tailnet requires device approval → approve the phone at login.tailscale.com/admin/machines.
Pairing is how the phone learns the relay address and receives your credential — through an encrypted exchange you approve on both devices. Nothing to type on the phone.
Run it in your own terminal, never through an agent. It rechecks the install, the credential and the private route from step 06, then shows a QR with an address and pairing code underneath. They expire after 2 minutes.
Connect your G2 in the Even Realities app, then open OcuClaw from Even Hub. Tap the Pair button; the Pair this phone sheet opens. Take a photo of the QR. Check that both screens show the same four words, in the same order. Tap The words match on the phone, then type approve in the terminal and press Enter. A few seconds later the terminal says Paired. Your phone is connected. Tap Done on the phone, before or after.
The terminal reports the credential delivered and this phone connected, and the app shows Connected with OpenClaw Status filled in (session, model). Approving alone is not connection — wait for both.
Words differ → type refuse and run openclaw ocuclaw pair again. No camera, or the QR looks broken → widen the terminal, or tap Enter the pairing code instead on the phone and type the address and code shown under the QR; use one method per code. Code expired → run openclaw ocuclaw pair again. Light terminal theme → add --light-terminal. Never paste the code, the address or the four words into a chat. Command not found → your plugin predates terminal pairing. Update it instead of typing the credential into the app. npm install: openclaw plugins update ocuclaw@latest. ClawHub install: openclaw plugins update ocuclaw.
See it on the glasses
One end-to-end check closes the loop. A reply on the G2 and you're done.
Proves the whole chain: phone → OpenClaw → glasses.
The reply is visible on the G2.
Reply visible in the app but glasses dark → wake the glasses (double-tap), reopen OcuClaw inside Even Hub, retry.
OpenClaw 2026.9.5 or later: if a phone setting will not save → run openclaw gateway restart --safe once.
Add OcuClaw to Hermes
OcuClaw needs Hermes 0.21.1 or newer. Version v2026.9.24 (Hermes 0.21.5) is recommended.
Follow the Hermes docs to install Hermes Desktop on this computer, then come back to this page.
Need a model login? Your ChatGPT subscription works (in Hermes Desktop: Other providers → ChatGPT or Codex Subscription). Otherwise Nous Portal, from the Hermes team, covers 300+ models and takes $15 off your first month with this link.
Affiliate link · OcuClaw may earn a commission if you subscribe.
ChatGPT sign-in refused? In ChatGPT, open Settings → Security and turn on device code login, then try again.
Open this page on the computer running Hermes Desktop, then click:
Install in Hermes→If your browser asks to open Hermes, choose Open Link. Hermes Desktop opens its install box with OcuClaw enabled by default. Confirm the install.
Desktop then shows a Custom (unreviewed) source notice; that is expected for OcuClaw. It also offers the OcuClaw theme; either choice is fine.
Having trouble?
Button did nothing? Paste this link into the address bar of any browser on the same computer:
No Hermes Desktop? Run these in a terminal, one at a time:
The second command switches Hermes to its terminal interface, which is where the pairing QR appears. You don’t need to restart the gateway yet. Setup saves its settings first, then asks for one restart that covers everything.
Ready when: An OcuClaw card appears at the top right of Hermes Desktop.
Connect your glasses
- On the OcuClaw card, click Restart gateway.
- When the card turns green and reads OcuClaw ready, click Pair your glasses. Hermes opens a chat and runs setup for you.
- Follow the chat until the Pair OcuClaw phone window opens with a QR.
Setup checks your Hermes version, restarts the gateway, and sets up Tailscale on this computer and your phone before it shows the QR.
Having trouble?
No OcuClaw card? Run this in a terminal, then reopen Hermes Desktop:
Installed from the terminal? Open Hermes, then enter the setup command. The pairing panel opens by itself; press m to see the address and code instead.
Setup asks you to restart the gateway in a terminal? Open a terminal, run hermes gateway restart, then say continue OcuClaw setup in the same chat.
Interrupted? Say continue OcuClaw setup in the same chat. It resumes at the last checkpoint.
Connect your G2 in the Even Realities app, then open OcuClaw from Even Hub.
- On the connection card, tap the Pair button. On the Pair this phone sheet, tap Take a photo of the QR code. One clear photo is enough.
- Check that both screens show the same four words, in the same order. Tap The words match on the phone, then click Yes — all four words match on the computer.
- On the phone’s Connection saved screen, tap Done. The phone connects on its own either way.
Having trouble?
No camera? In the pairing window, click Show pairing code (in the terminal, press m). Type the address and the 8-character code on the phone instead, without the dash. Use one method per code: photograph it or type it, not both.
A pairing code lasts about two minutes, so approve on the computer soon after the words appear. If it expires, start pairing again on the computer; the old code no longer works.
Still stuck? Run hermes ocuclaw doctor, or ask in the OcuClaw Discord.
Send a message from OcuClaw on your phone. When the Hermes welcome appears on your G2, double-tap while it is visible.
Having trouble?
If the phone works but the glasses stay dark, wake the glasses with a double-tap, reopen OcuClaw inside Even Hub, and try again.
After a plugin update, run hermes plugins update ocuclaw then hermes gateway restart. Your pairing survives.
Ready when: Your phone connects and the Hermes welcome appears on your G2.
Connect to Cloudways
Open Cloudways and click Start free in the top right of the page.
Fill in the sign-up form and verify your email.
Use code ocuclaw at checkout for 30% off your first 3 months.
Affiliate link · OcuClaw may earn a commission from eligible purchases.
In Cloudways, open Cloudways AI → Managed AI Agents and deploy a Hermes agent.
For instance size, we advise selecting Operator at a minimum.
Using your ChatGPT subscription? Choose Skip at the model-provider step. Using an API key? Select your provider and enter its key here instead; setup then skips its sign-in question.
While your agent deploys: install Tailscale on your phone and sign in (setup asks for it at [5/8] Connect to Tailscale). Connect your G2 in the Even app and add OcuClaw from Even Hub (setup pairs it at [7/8] Pair your phone).
Wait until your Hermes agent has finished deploying in Cloudways before you connect.
Press Command + Space, type Terminal, and press Enter.
Open Start and launch PowerShell or Windows Terminal.
Open Terminal from your app launcher, or try Ctrl + Alt + T.
In Cloudways, open Cloudways AI → Managed AI Agents and click your agent’s name. Don’t click Open Agent; that leaves Cloudways for your agent’s own login.
Under SSH Credentials, click How to use? Copy the SSH command, paste it into your terminal, and press Enter.
On your first connection, check the server address and answer yes to the host-key prompt. Enter the SSH password, not the web-interface password. Nothing appears while you type or paste it; that is normal.
If you see Too many authentication failures, retry with password login, using your own SSH details:
Keep this terminal open. Run the following commands here, on your cloud agent.
Having trouble?
Keep the custom port in Cloudways’ copied command. If the agent is still deploying, wait and try again.
If ssh is not recognized, enable the Windows OpenSSH Client in Optional features and reopen PowerShell.Use your Mac’s Terminal app; Hermes does not need to be installed on your Mac.If ssh is missing, install your distribution’s OpenSSH client package.
Ready when: You’re connected when the terminal prompt shows your Cloudways username.
Start OcuClaw setup
Run this in the terminal you just connected with:
Hermes may first warn about a custom (unreviewed) source. That is expected: OcuClaw installs from its own repository, not the Hermes catalog.
Hermes ends with Restart the gateway for the plugin to take effect: You can skip that for now. Run setup first. It tells you when a restart is needed, just once.
Having trouble?
If installation fails, stop and keep the error text for OcuClaw support.
Never install with --ref. A ref-pinned install is recorded as pinned, and hermes plugins update ocuclaw then refuses to move it forward.
Run:
Setup walks through eight stages and resumes past work already done. This first run stops at [3/8] and asks for one restart.
If no model is signed in yet, setup asks No model is signed in yet. Which account will this agent use? Type the number of your choice at Choose 1–4:. Setup then runs the sign-in for you and shows each command after Running:. Open the link Hermes prints, enter its code and sign in, then choose a model in the menu that follows. Wait for Model signed in. If you entered an API key in the Cloudways deploy wizard, or a model is already signed in, setup skips this.
Which account to choose:
ChatGPT subscriptionUse the plan you already have
Type 1. Setup runs hermes auth add openai-codex --no-browser, then hermes model.
Sign-in refused? In ChatGPT, open Settings → Security and turn on device code login, then run setup again.
In the model menu, choose OpenAI → ChatGPT or Codex Subscription → Use existing credentials, then an available model.
Nous PortalNo ChatGPT plan? The official Hermes subscription
Nous Portal is the official subscription from the team behind Hermes. One sign-in covers 300+ models plus web search, image generation and voice, from $20 a month. This link takes $15 off your first month.
Once you have an account, type 2. Setup runs hermes auth add nous --no-browser, then hermes model. Choose Nous Portal in the model menu.
Affiliate link · OcuClaw may earn a commission if you subscribe.
Claude subscriptionNot allowed here. See why
Anthropic’s terms don’t permit Claude Free, Pro or Max plans to be used through other apps like Hermes. They only cover Claude’s own apps, and Anthropic can enforce this without notice. Read Anthropic’s policy.
The two best-value options are a ChatGPT subscription, which OpenAI allows in tools like Hermes, or Nous Portal. Both are above.
A Claude API key from the Claude Console is still allowed, but it bills per use.
Didn’t enter a key in Cloudways, but want an API key or another provider? Type 3. Setup runs hermes model, which asks for the key and the model.
- [2/8] Settings: read the changes, then type y or yes. Add --details to see the exact settings.
- [3/8] OcuClaw: setup stops with OcuClaw is installed but your agent has not loaded it yet. That is expected. The next step is the one restart.
Prefer to sign in yourself?
Type 4 at the question. Setup stops and prints To sign in yourself, run one of these, then run setup again:
Then choose a model, or enter an API key:
To check that your model answers:
Then run hermes ocuclaw cloudways setup again.
Having trouble?
If a sign-in command did not finish, run it again yourself, then run setup again. If the sign-in code expires, run the sign-in again for a fresh one.
Setup went past [3/8] with OcuClaw is loaded and ready.? Your agent has already restarted since the install. Skip the restart in the next step; this run carries on.
For diagnostics, run:
Prefer to be walked through it?
Hermes can do the same work in conversation instead. The pairing panel lives in the terminal interface, so switch to it first:
Open a fresh Hermes:
Then enter:
It is slower and it uses model tokens. Before it restarts anything, keep its SSH reconnect command and the exact resume command it gives you, on your own computer. A restart here closes SSH, Hermes and tmux.
Resume that exact conversation and say continue OcuClaw setup. Do not reopen the latest chat unless it is the setup conversation.
Ready when: Setup stops at [3/8] OcuClaw and asks for one restart.
Restart once, then finish setup
This one restart loads OcuClaw and the settings from [2/8]:
It restarts the whole container, so SSH disconnects. Reconnect in about a minute with the same SSH command.
The restart also clears your shell history, so copy this command from here and run it again:
It picks up at [4/8]. [2/8] and [3/8] now say Settings already applied. and OcuClaw is loaded and ready.
- [5/8] Connect to Tailscale: setup shows a QR to approve this server. With Tailscale signed in on your phone, point the phone’s camera at the QR and approve the server. The link printed under it does the same.
- [6/8] Private route for your phone: read the exact command. It allows access from your tailnet only, never the public internet or Tailscale Funnel. Type the whole word yes; y does not apply the route.
Wait for the route and certificate checks. Keep Tailscale switched on and signed in with the same account on your phone.
Having trouble?
You can also restart the agent from your Cloudways dashboard. A disconnect during the restart does not erase setup; reconnect rather than creating another agent.
Stopped or SSH disconnected? Reconnect and run the same setup command. Earlier changes are kept; completed work is skipped.
If the container restarted while [5/8] was waiting, setup says The last approval link stopped working when the container restarted. Starting a fresh one. Approve the new QR.
For diagnostics, run:
To inspect without pairing or sending a first message:
Use the Cloudways SSH host for this flow. Do not install system Tailscale with sudo or systemd.
If the phone is not found, open Tailscale, use the same account, and switch it on. Follow the terminal’s wait or continue choice.
To avoid signing in again after device-key expiry, turn off expiry for this device in the Tailscale admin console.
Ready when: The setup command reaches [7/8] Pair your phone.
Connect your glasses
Your G2 should be connected in Even, with OcuClaw added from Even Hub. At [7/8], the terminal waits before it creates a code:
Open Even > OcuClaw on your phone and tap the Pair button, then press Enter to show the code.
The next pairing code expires in 2 minutes.
- Open Even > OcuClaw on your phone and tap the Pair button. The Pair this phone sheet opens. Then press Enter in the terminal.
- Tap Take a photo of the QR code and take a photo of the QR in the terminal.
- Match the phone’s four words with the terminal, in the same order.
- If they match, tap The words match on the phone. At Type approve, refuse, or cancel:, type approve and press Enter.
- A few seconds later the terminal says Paired. Your phone is connected. On the phone’s Connection saved screen, tap Done. The order does not matter.
Having trouble?
No usable QR? Tap Enter the pairing code instead on your phone and type the Address and Pairing code shown in the terminal. A small terminal uses this fallback automatically.
Words differ? Type refuse. To stop, type cancel. Letter case does not matter; a typo never approves.
Code expired? The terminal reports where pairing stopped, then asks Press Enter for a new code, or type stop: Open the pair screen first, then press Enter. It creates a new code in the same setup command, up to three retries. If no phone joined, check that Tailscale on your phone is switched on and signed in to the same account.
If approval was sent but the connection is uncertain, check the phone before retrying. Do not assume that approval alone completed pairing.
Use one method per code. Never share the address, code or four words in a chat. For diagnostics, run:
At [8/8], the terminal says In the paired conversation on your phone, send hello.
Watch the reply on your glasses. The terminal then says Your phone reported SDK acceptance of the reply. The welcome follows after the reply finishes.
If the terminal asks whether you saw the reply, confirm only if you actually saw it. Follow the prompt shown; do not enter a confirmation before it asks.
Having trouble?
A model error or rate limit leaves setup unfinished and does not send the welcome. Fix the model account or wait for its limit, then run the same setup command.
If the phone has a reply but the glasses do not, do not confirm seeing it. Wake the glasses, reopen OcuClaw inside Even Hub, and follow the terminal’s retry instructions.
Keep Tailscale on. For diagnostics, run hermes ocuclaw doctor.
The welcome stays inside the same setup command. When it appears, the terminal says Double-tap the welcome on your glasses to finish.
Double-tap while it is visible. Wait for OcuClaw setup is complete for this Hermes profile.
Two optional notes follow. Voice and Even AI are on the Optional setup card on your phone’s Home. To enable the phone’s + button, choose agent mode with /ocuclaw-setup in a Hermes chat. No extra restart is needed to finish this setup.
Having trouble?
Phone disconnected or welcome not dismissed? Run the same setup command and follow its recovery instructions. Leave this step unchecked until setup reports it is complete.
Still stuck? Run hermes ocuclaw doctor, or ask in the OcuClaw Discord.
Ready when: You have double-tapped the welcome on your G2 and the terminal prints OcuClaw setup is complete for this Hermes profile.
Connect to Cloudways
Open Cloudways and click Start free in the top right of the page.
Fill in the sign-up form and verify your email.
Use code ocuclaw at checkout for 30% off your first 3 months.
Affiliate link · OcuClaw may earn a commission from eligible purchases.
In Cloudways, open Cloudways AI → Managed AI Agents and deploy an OpenClaw agent.
For instance size, we advise selecting Operator at a minimum.
Using your ChatGPT subscription? Choose Skip at the model-provider step. Using an API key? Select your provider and enter its key here instead; setup then skips its sign-in question.
While your agent deploys: install Tailscale on your phone and sign in (setup asks for it at [5/8] Connect to Tailscale). Connect your G2 in the Even app and add OcuClaw from Even Hub (setup pairs it at [7/8] Pair your phone).
Wait until your OpenClaw agent has finished deploying in Cloudways before you connect.
Press Command + Space, type Terminal, and press Enter.
Open Start and launch PowerShell or Windows Terminal.
Open Terminal from your app launcher, or try Ctrl + Alt + T.
In Cloudways, open Cloudways AI → Managed AI Agents and click your agent’s name. Don’t click Open Agent; that leaves Cloudways for your agent’s own login.
Under SSH Credentials, click How to use? Copy the SSH command, paste it into your terminal, and press Enter.
On your first connection, check the server address and answer yes to the host-key prompt. Enter the SSH password, not the web-interface password. Nothing appears while you type or paste it; that is normal.
If you see Too many authentication failures, retry with password login, using your own SSH details:
Keep this terminal open. Run the following commands here, on your cloud agent.
Having trouble?
Keep the custom port in Cloudways’ copied command. If the agent is still deploying, wait and try again.
If ssh is not recognized, enable the Windows OpenSSH Client in Optional features and reopen PowerShell.Use your Mac’s Terminal app; OpenClaw does not need to be installed on your Mac.If ssh is missing, install your distribution’s OpenSSH client package.
Ready when: You’re connected when the terminal prompt shows your Cloudways username.
Install OcuClaw
Run this in the terminal you just connected with:
If it asks Proceed with installation? [y/N], type y. Newer OpenClaw then lists what OcuClaw needs and asks Accept these capabilities and install "ocuclaw"? [y/N]. Type y again.
It takes 30 seconds to 3 minutes. The installer ends with Installed plugin: ocuclaw. Newer OpenClaw adds Applied in Gateway generation and a number. Older OpenClaw adds Restart the gateway to load plugins. You can skip that on Cloudways. Setup loads OcuClaw and tells you if a restart is needed. Your SSH session stays connected.
OpenClaw also prints a Config warnings box about WhatsApp. It is about OpenClaw’s own WhatsApp settings, not OcuClaw, and it appears on every openclaw command, sometimes more than once. You can skip it. Some agents also show a Doctor warnings box about another plugin. That is not about OcuClaw either.
You don’t need openclaw gateway restart. It does nothing on Cloudways. You don’t need to stop the gateway process yourself unless setup asks you to. That restarts the whole agent and drops SSH for about a minute. If that happens, reconnect with the same SSH command. Nothing is lost.
Having trouble?
If installation fails, stop and keep the error text for OcuClaw support. A disconnect does not erase setup. Reconnect rather than creating another agent.
Ready when: The install finishes and your SSH session is still connected.
Run OcuClaw setup
In the same terminal, run:
Setup walks through eight stages and resumes past work already done.
If no model is signed in yet, setup asks No model is signed in yet. Which account will this agent use? Type the number of your choice at Choose 1–3:, and setup runs the sign-in for you. If you entered an API key in the Cloudways deploy wizard, or a model is already signed in, setup skips this.
Which account to choose:
ChatGPT subscriptionUse the plan you already have
Type 1. Setup runs openclaw models auth login --provider openai --device-code --set-default. Open the link it prints, enter the code, and sign in. Wait for Model signed in.
Sign-in refused? In ChatGPT, open Settings → Security and turn on device code login, then run setup again.
Claude subscriptionNot allowed here. See why
Anthropic’s terms don’t permit Claude Free, Pro or Max plans to be used through other apps like OpenClaw. They only cover Claude’s own apps, and Anthropic can enforce this without notice. Read Anthropic’s policy.
The best-value option is a ChatGPT subscription, which OpenAI allows in tools like OpenClaw. It’s the row above.
A Claude API key from the Claude Console is still allowed, but it bills per use.
Didn’t enter a key in Cloudways, but want an API key or another provider? Type 2. Setup runs openclaw models auth login --set-default; pick your provider from its list.
- [2/8] Conversation access: read what OcuClaw needs, then type y or yes. Add --details to see the exact setting.
- [3/8] OcuClaw: setup checks that OcuClaw is loaded. On newer OpenClaw it may say Still checking. This can take up to 3 minutes. Leave it running. It then says OcuClaw is loaded and ready. and carries on.
- [5/8] Connect to Tailscale: setup shows a QR to approve this server. With Tailscale signed in on your phone, point the phone’s camera at the QR and approve the server. The link printed under it does the same.
- [6/8] Private route for your phone: read the exact command. It allows access from your tailnet only, never the public internet or Tailscale Funnel. Type the whole word yes; y does not apply the route.
Wait for the route and certificate checks. Keep Tailscale switched on and signed in with the same account on your phone.
Prefer to sign in yourself?
Type 3 at the question. Setup stops and prints the sign-in commands. For a ChatGPT subscription:
For an API key:
To check the default model and its sign-in:
To check that your model answers:
Then run openclaw ocuclaw cloudways setup again.
Having trouble?
Sign-in code expired, or Sign-in did not finish. No model is signed in yet.? Run the same setup command again for a fresh code.
Stopped or SSH disconnected? Reconnect and run the same setup command. Earlier changes are kept; completed work is skipped.
Setup stopped at [3/8] with One restart loads OcuClaw.? This happens after an upgrade or reinstall, or when OcuClaw did not load by itself. Run the command it prints, once:
SSH disconnects. Reconnect in about a minute and run openclaw ocuclaw cloudways setup again.
Setup stopped at [3/8] with Restart the agent from your Cloudways dashboard, then run openclaw ocuclaw cloudways setup again.? Your agent is not running, so pkill would do nothing. Restart the agent from your Cloudways dashboard. SSH drops. Reconnect with the same SSH command and run setup again.
Just restarted the agent, here or from your Cloudways dashboard? It takes about 2 minutes to start. If a command says Gateway not reachable, wait a minute and run the same command again. You don’t need openclaw gateway run. The agent starts its own gateway.
If the container restarted while [5/8] was waiting, setup says The last approval link stopped working when the container restarted. Starting a fresh one. Approve the new QR.
For diagnostics, run:
To inspect without pairing or sending a first message:
Use the Cloudways SSH host for this flow. Do not install system Tailscale with sudo or systemd. Do not run openclaw gateway restart for this setup.
If the phone is not found, open Tailscale, use the same account, and switch it on. Follow the terminal’s wait or continue choice.
To avoid signing in again after device-key expiry, turn off expiry for this device in the Tailscale admin console.
Prefer to be guided?
OpenClaw can do the same work in conversation instead. Open the agent:
Then say:
It is slower, about half an hour, and it uses model tokens. Pairing then needs a second terminal window, connected with the same SSH command, running openclaw ocuclaw pair.
If anything interrupts it, reopen the same conversation and say continue OcuClaw setup. Do not start a new chat.
An approval box appears when OpenClaw sets up your private relay. Its cursor starts on Deny. Move to Allow once, then press Enter.
Ready when: The setup command reaches [7/8] Pair your phone.
Connect your glasses
Your G2 should be connected in Even, with OcuClaw added from Even Hub. At [7/8], the terminal waits before it creates a code:
Open Even > OcuClaw on your phone and tap the Pair button, then press Enter to show the code.
The next pairing code expires in 2 minutes.
- Open Even > OcuClaw on your phone and tap the Pair button. The Pair this phone sheet opens. Then press Enter in the terminal.
- Tap Take a photo of the QR code and take a photo of the QR in the terminal.
- Match the phone’s four words with the terminal, in the same order.
- If they match, tap The words match on the phone. At Type approve, refuse, or cancel:, type approve and press Enter.
- A few seconds later the terminal says Paired. Your phone is connected. On the phone’s Connection saved screen, tap Done. The order does not matter.
Having trouble?
No usable QR? Tap Enter the pairing code instead on your phone and type the Address and Pairing code shown in the terminal. A small terminal uses this fallback automatically.
Words differ? Type refuse. To stop, type cancel. Letter case does not matter; a typo never approves.
Code expired? The terminal reports where pairing stopped, then asks Press Enter for a new code, or type stop: Open the pair screen first, then press Enter. It creates a new code in the same setup command, up to three retries. If no phone joined, check that Tailscale on your phone is switched on and signed in to the same account.
If approval was sent but the connection is uncertain, check the phone before retrying. Do not assume that approval alone completed pairing.
Use one method per code. Never share the address, code or four words in a chat. For diagnostics, run:
At [8/8], the terminal says In the paired conversation on your phone, send hello.
Until the reply arrives, the terminal shows one line, Waiting for the phone reply (1 minute so far)., and updates the time every 30 seconds. Watch the reply on your glasses. The terminal then says Your phone reported SDK acceptance of the reply. The welcome follows after the reply finishes.
If your agent is busy, the terminal may say The gateway is slow to answer. Still waiting for it... Leave it running. It keeps asking for up to 2 minutes.
If the terminal asks whether you saw the reply, confirm only if you actually saw it. Follow the prompt shown; do not enter a confirmation before it asks.
Having trouble?
A model error or rate limit leaves setup unfinished and does not send the welcome. Fix the model account or wait for its limit, then run the same setup command.
If the phone has a reply but the glasses do not, do not confirm seeing it. Wake the glasses, reopen OcuClaw inside Even Hub, and follow the terminal’s retry instructions.
Terminal says The gateway did not answer? Your setup progress is saved. When your agent answers again, run openclaw ocuclaw first-use.
Keep Tailscale on. For diagnostics, run openclaw ocuclaw doctor.
The welcome stays inside the same setup command. When it appears, the terminal says Double-tap the welcome on your glasses to finish.
Double-tap while it is visible. Wait for OcuClaw setup is complete for this OpenClaw installation.
Voice and Even AI can be added later, from the Optional setup card on your phone’s Home.
Having trouble?
Phone disconnected or welcome not dismissed? Run the same setup command and follow its recovery instructions. Leave this step unchecked until setup reports it is complete.
Still stuck? Run openclaw ocuclaw doctor, or ask in the OcuClaw Discord.
Ready when: You have double-tapped the welcome on your G2 and the terminal prints OcuClaw setup is complete for this OpenClaw installation.
(Optional) Connect Desktop
Install and open Hermes Desktop first if you haven’t already.
Already using OcuClaw locally? Update the OcuClaw plugin in your local Hermes first. Run hermes plugins update ocuclaw, then hermes gateway restart. Fully quit and reopen Desktop on your local connection before continuing. Updating Cloudways does not update your local plugin.
Open a new Terminaldesktop terminalPowerShell window (not administrator or WSL) on your computer, outside your Cloudways SSH session. Run:
Paste your Cloudways SSH command. Then, in this order:
- At Allow this computer to connect? Type yes: type yes. SSH asks for your Cloudways SSH password twice. Nothing shows while you type.
- Under Check the server, SSH asks you to trust the server. Type yes, then enter your Cloudways SSH password.
- Under Protect your connection, choose a new passphrase for this computer’s key, then type it again to confirm. Do not reuse your Cloudways password.
- Under Save access on the server, enter your Cloudways SSH password once more.
The helper ends with SSH connection verified and your connection alias, ocuclaw-cloudways-…. You type it into Desktop as the SSH host next.
At Add OcuClaw to Hermes Desktop? Type yes, or press Enter to skip: type yes for live glasses status, battery and agent activity. At Close Hermes Desktop, then type yes to install here, close Desktop and type yes again. Enter alone skips.
Under Save your key, before the last password prompt, GNOME’s Unlock private key window wants the new key passphrase you just chose (not your Cloudways password). Select “Automatically unlock this key whenever I’m logged in”, then Unlock.
Reopen Desktop. If you added OcuClaw, it first asks Make Desktop feel like OcuClaw? Choose Use OcuClaw theme or Keep current theme. Both show the glasses icon. Change themes later in Settings → Appearance.
Open Settings (the gear) → Gateways → Saved connections → Add connection → SSH. Enter a Name such as Cloudways, and type the alias into SSH host. Click Save connection, then Test. A small Reachable notice appears at the bottom right.
Switch to it from the profile button at the bottom of the sidebar (default · Cloudways). Gateway ready can take about 15 seconds. Then send a message.
Selecting Cloudways in Desktop does not switch your phone or glasses pairing. Pair with Cloudways through its setup flow when you want to use that agent on your glasses.
Ready when: Your Cloudways agent replies in Desktop.
Already connected Desktop?
Already using OcuClaw locally? Update the OcuClaw plugin in your local Hermes first (hermes plugins update ocuclaw, then hermes gateway restart). Fully quit and reopen Desktop on your local connection. Add the icon without repeating SSH setup. Run on your computer:
If the icon is missing after reopening, enable OcuClaw under Capabilities → Plugins. Keep OcuClaw open on your paired phone for current glasses status.
Having trouble?
Run the same command again to continue. Keep the saved files. If you press Ctrl-C, the helper says in one line what that run changed. Your key passphrase unlocks this computer’s key; your Cloudways password belongs only in the SSH password prompt.
Unlock your login Keychain if prompted. After interrupted removal, rerun removal and enter your setup key passphrase if asked.
Tested on Ubuntu 24.04.4 with GNOME on X11 and gcr. Unlock your login keyring. Other desktop sessions are not yet verified.
If OpenSSH or its agent service needs administrator setup, complete that prerequisite, then retry from normal PowerShell. If Windows Security blocks the helper, keep the detection details; do not disable protection or change organisation policy.
Still stuck? Share the helper version and error text in OcuClaw Discord. Never share keys, passwords or passphrases.
Remove this computer’s access
Wait for “Access removed”, then delete the saved connection in Desktop. Other keys stay untouched. Existing SSH sessions may continue until closed.
This keeps the local OcuClaw addition. To remove that too, rerun the helper with desktop-remove instead of remove.
(Optional) Give OcuClaw a whole new toolbox.
Optional, recommended · Monid
Connect your assistant to 2,000+ tools spanning research, automation, media creation and editing, and everyday tasks. Monid lets your agent find and use extra capabilities on demand, without you having to set up each service yourself.
Paired with OcuClaw and Live UI, that means more your assistant can do for you—and more it can show you. Install the skill, connect your account, and let your agent find the tools to take your ideas further.
One account. No subscription. Pay only for what your agent uses. Free credit to try it when you sign up with the link below.
Paste the prompt into your OcuClaw agent’s chat.
Connect Monid in three steps
- Create your accountSign up using the Monid button above.
- Install the skillCopy the installation prompt and paste it into your agent’s chat.
- Connect your API keyCreate a key in your Monid dashboard, then give it to your agent in a private chat when prompted to finish setup.
set up https://monid.ai/SKILL.md
Affiliate links — we may earn a commission if you sign up through the Monid links in this section.
Setup complete.
Voice and Even AI are on the Optional setup card on your phone’s Home.